Pages

Thursday, November 26, 2009

Garlicky Knots

Leonardo's Pizza in Gainesville, Florida makes the most amazing rolls. What makes them over-the-top awesome is not-so-much the roll itself, but the garlic butter dipping sauce that they serve with the rolls. Since I no longer live in Gainesville, I had to figure out how to make something similar to be able to enjoy these yummy treats. Betty Crocker to the rescue! The recipe for the dough is Betty's dinner roll recipe, but I rolled the dough into a rope and tied it into a loose knot shape. My own version (though not quite as delectable) of the garlic butter sauce follows.


(Does this runner look at all familiar? Maybe I need to invest in a new one...)

Knots
3 1/2 to 3 3/4 cups bread flour (you can use all-purpose flour in a pinch)
1/4 cup sugar
1/4 cup butter or margarine, softened
1 tsp salt
1 pkg yeast (2 1/4 tsp)
1/2 cup very warm water
1/2 cup very warm milk
1 egg

1. Stir together 2 cups of the flour, the sugar, butter, salt, and yeast. Add the water, milk, and egg, and beat on low for 1 minute. Turn up to medium speed and beat 1 additional minute. Add enough of the remaining flour until a dough ball forms.

2. If you have a stand mixer, change from the beater attachment to the dough hook and knead for 6 minutes. If you don't, you'll have to get a workout here. Add flour as necessary to keep the dough from getting sticky.

3. Spray the bowl that you initially used to beat the dough with cooking spray, put the dough ball in, spray the dough with cooking spray until covered, and cover the bowl with a towel. Allow to rise for about 1 hour. If you poke it and the imprint of your finger stays in the dough, it's ready to go.

4. Roll out the dough on a floured surface. Separate it into 16 pieces. Roll each piece into a rope approximately 6 to 8 inches in length (slighty wetting your hands prior to rolling each piece helps). Loosely tie the rope into a knot and place either on greased cooking sheet or in the cups of a muffin tin (spray those with cooking spray, too). Cover and allow to rise an additional 30 minutes.

5. Bake for 12-14 minutes at 375 degrees.

Garlicky Sauce

5 Tbsp. butter or margarine, melted
1 tsp. kosher salt (or about 1 tsp. regular salt, if you don't have kosher)
1/2 tsp. cornstarch
1 1/2 tsp. parmesan garlic spread mix
1 tsp. sugar
1 tsp. vinegar

Whisk the ingredients together in microwave-safe bowl. Cover loosely and microwave for 10-15 seconds, or until it starts to bubble a bit. Whisk again to combine. If you have an immersion blender, you could use it here to combine the ingredients a bit better (and they'll stay combined for longer).

Sunday, November 22, 2009

Baked Macaroni and Cheese

Congratulations to me! I recently defended my doctoral dissertation to my graduate committee, which means that I will hopefully have much more time to cook. More time for me to cook, in turn, leads to more posts to my blog...so, yay to those of you who point your browsers here occasionally for recipes or menu ideas. After the longer-than-I'd-like hiatus from blogging due to the craziness surrounding my dissertation, I am hoping to make publishing to my blog a more regular occurrence. Not to mention, cooking in general. This Sunday afternoon was a perfect time to start. And what more perfect, comfort food dish to start with than macaroni and cheese?

I adore carbohydrates, and I adore cheese. What could be better than a combination of the two? Pure make-your-tummy-happy food. My fondness for macaroni and cheese means that I have multiple recipes for macaroni and cheese, which vary based on their ingredients, complexity, and healthfulness. This recipe happens to be one of the none-too-healthy, more complex versions that I make. More complex only because it unfortunately dirties more than one pan, involves the oven, and requires more ingredients than some recipes. It's a good one, though. With the colder weather coming, you may see more versions of this favorite comfort food coming on my blog, too. Yum.

The cheese that I use in my macaroni and cheese varies based on the types that I have in my refrigerator. I have experimented with lots of variations -- mozzarella, parmesan, gouda, swiss, havarti, cheddar, mexican blend, american, even goat cheese that I needed to use up -- and have never come up with a blend that I didn't like. That could either be due to my fondness for macaroni and cheese, or to the fact that cheese is awesome in any form or variety. For the macaroni and cheese shown below, I used havarti slices that I chopped up, low-fat american slices that I also chopped up, shredded mozzarella, and goat cheese (you caught me -- it was the goat cheese that needed to be used up!). Turned out to be an amazing combination.


Ingredients
1 lb. elbow macaroni
4 Tbsp. butter or margarine
2 eggs
1/3 cup whipping cream
1/3 cup milk
(or, you could use 2/3 cup half and half in place of the whipping cream and milk. Whatever you have on hand.)
salt and pepper
dash of nutmeg, if desired
2 cups cheese (any variety that you like)
approx. 1/3 cup panko bread crumbs
cooking spray

Instructions
1. Boil the elbow macaroni in salted water until almost al dente. Drain; return to pot. Add butter and stir until macaroni are evenly coated.

2. In an oven-safe casserole dish, whisk the eggs until slightly frothy. Add the whipping cream and milk (or the half and half), salt, pepper, and nutmeg and whisk to combine. Stir in the cheeses.

3. Add the cheese mixture to the macaroni in the pot and stir until the cheese starts to melt. Transfer the mixture back to the casserole dish, and top with the panko bread crumbs. Spray the bread crumbs with cooking spray to help them brown. Bake in a 375 degree oven for 20 minutes or until lightly browned on top.

Saturday, November 14, 2009

Spinach Artichoke Mini Quiches

This recipe was inspired by the Spinach Artichoke Baked Egg Souffles at Panera Bread. I modify it based on what I have in my pantry or refrigerator at the time, and you can certainly adjust the amounts of the vegetables (or the types, for that matter) depending on what you have on hand. To make the recipe lighter, you could substitute half and half for the heavy whipping cream (also good if you're the type of person who likes h'n'h in your coffee and doesn't feel like purchasing an entire pint of whipping cream to only use half of it).


1/4 cup onion, diced
1 tsp. garlic, minced
1/3 can (about 1/4 cup) artichokes, chopped
1/2 cup fresh chopped spinach or 1/4 cup frozen chopped spinach
1/8 cup sundried tomatoes, diced (or roasted red peppers work well)
1/2 tsp. red pepper flakes
salt and pepper (to taste, but you'll probably want to start with about 1-2 tsp. of salt and 1/2 tsp. of pepper)
8 eggs
1 cup heavy whipping cream
2/3 cup parmesan cheese
2 cans crescent rolls

For the filling, saute the onions and garlic in a frying pan with 2 T. butter or margarine over medium heat until soft. Add the artichokes, spinach, tomatoes or red peppers, and red pepper flakes and continue sauteing until everything is cooked, approximately 5 minutes. Add salt and pepper to taste. Set aside to cool slightly.

In a bowl, whisk the eggs and whipping cream until combined. Add the parmesan cheese and the vegetable mixture.

Dusk a working surface and roll out the crescent rolls into one sheet. Cut the sheet into approximately 12 squares. Spray muffin tins with cooking spray, and loosely arrange the crescent roll squares into the muffin cups (1 square per muffin cup). Pour the quiche mixture over the crescent dough, filling each muffin cup approximately 2/3 full (the quiche mixture will puff slightly while cooking. Bake at 425 degrees for 12-15 minutes, removing them when the dough is beginning to turn golden brown and the egg mixture is set.

If you're having trouble with the crescent dough browning before the egg is set, you can microwave the egg mixture prior to filling the muffin cups (just be sure to use a glass mixing bowl for the egg mixture). Microwave it for 1-minute intervals, stirring between each interval, for approximately 5 minutes. On the other hand, you can pre-cook your crescent dough slightly (3-4 minutes) prior to filling them with the egg mixture. Pre-cooking the dough will allow it to puff slightly and keep the croissant texture, even after you've added the egg mixture.

Friday, August 14, 2009

Chocolate-Chip Banana Bread

I am notorious for purchasing bananas at the grocery store and then forgetting to eat them. Alas, I often end up with brown bananas on the verge of total repulsiveness. As luck would have it, these uglies are perfect for making banana bread. The few times that I've had a craving for banana bread with only yellow bananas in sight, the resulting banana bread has been sub-par. So don't throw those guys away! Unless they're molding, and in which case, do not feel guilty tossing them. No mold = perfect candidates for banana bread.

I found an extremely easy, very basic banana bread recipe over at Elise's Simply Recipes (which has great recipes, by the way!), and doctored it up a bit with some chocolate chips. Because, really, is there a recipe that isn't made just a bit better with chocolate in it? No, of course not.


Ingredients
3 ripe bananas (or 4 if they're small)
1/3 cup butter, melted
1 cup sugar
1 egg
1 teaspoon vanilla
1 teaspoon baking soda
1/4 teaspoon salt
1 1/2 cups flour
2/3 cup chocolate chips, plus some extra to sprinkle on top
Directions
In a large bowl, mash the bananas (a potato masher works well here). Stir in the melted butter, sugar, egg, and vanilla (in that order, with a spoon). Sprinkle the baking soda and salt over the mixture, and then stir in the flour and chocolate chips until just combined. Spray a loaf pan with non-stick cooking spray, and pour the batter into it. Sprinkled the remaining handful of chocolate chips on top to make it pretty. Bake in a 325 degree oven for about an hour, or until it's golden around the edges. To test, stick a toothpick into the center and check to see that there's no gooey batter on it when you pull it out (but don't overcook it...better to be slightly under done than dry).

Sunday, August 09, 2009

Crock Pot Cheesy Macaroni and Corn

This is another one of the wonderful recipes included in the recipe booklet that my cousin Candy put together for the family reunion (thanks again, Candy!). This recipe comes courtesy of my cousin Pam and her daughter, Mandy. Pam mentioned to me at the family reunion that it was super simple, and she was definitely right. You can't get much easier than dumping a bunch of stuff in a crock pot and turning it on. Since I have a slight obsessive compulsive lean, I had to check on it every 30 minutes or so and give it a good stir. It would still have turned out awesome without my OCD tendencies, though!

Ingredients
2 sticks butter or margarine
2 cans whole kernel corn, undrained
2 cans cream-style corn
2 cups uncooked elbow macaroni
1 jar of Cheez Whiz

Directions
Unwrap sticks of margarine and toss in Crock Pot. Open cans of corn and jar of Cheez Whiz and add to Pot. Open box of macaroni, measure out 2 cups, and add to Pot. Stir it all together. Turn on Crock Pot to high and wait 3 to 4 hours. Stir every once in awhile, if you're around the Pot. Done! So easy a caveman could do it, if he had electricity...

Wednesday, August 05, 2009

Black Magic Cupcakes with Peanut Butter Frosting

The Turner-Gallaher Family Reunion occurs every summer on the last Saturday in July. This past weekend, I made my annual pilgrimage to Pennsylvania to spend some time with my beloved relatives (you know who you are!). My wonderful cousin, Candy, was sweet enough to put together a collection of old family recipes submitted by my relatives. These recipes included lots of recipes for dishes I've enjoyed at our reunions every year.

After browsing through the collection, I found two recipes that piqued my interest for "black magic cake" and "peanut butter frosting." Although they were listed under my cousin Laura's name, I was wondering if it was a recipe possibly passed down to her from her mom or grandmother (my lovely cousin Cherry and my adorably sweet Aunt Ivy). I remembered an awesome sheet cake covered in a light and fluffy peanut butter frosting at the family reunions of my childhood, and thought maybe this recipe was it. Since I couldn't stop thinking about it all week, I figured I might as well take an evening and make some chocolate cake with peanut butter frosting. I wasn't disappointed, but I'll have to leave it to my cousins and aunt to confirm my suspicion on the recipe.


Black Magic Cake

Ingredients

1 3/4 cups flour
2 cups sugar
2 tsp. baking soda
1 tsp. baking powder
3/4 cup cocoa (use half dark chocolate cocoa, if desired)
2 eggs
1 cup coffee
1 cup sour milk (use 1 Tbsp. of lemon juice or white vinegar to sour it, unless you recently came across a half gallon that you've forgotten about at the back of your refrigerator)
1/2 cup vegetable oil
1 tsp. vanilla
1 tsp. salt


Mix the dry ingredients together, and then blend the wet ingredients into the dry ingredients until combined. Beat on medium-high for 1 to 2 minutes (mixture will be slightly runnier than your traditional boxed cake mix). Line muffin tins with papers and fill each approximately 2/3 full. Bake at 350 degrees for approximately 20 minutes. Cool before frosting.


Peanut Butter Frosting

Ingredients

1/2 cup shortening
1/2 cup sugar (not powdered, just the regular kind)
1 tsp. vanilla
1/2 cup milk
4 Tbsp. flour
3 heaping Tbsp. peanut butter


Cream together the shortening and the sugar until fluffy. Add the vanilla, milk and the flour (the mixture will be really liquidey at this point...not to worry, it will all come together). Add the peanut butter, and beat on medium high until it's smooth and fluffy (about 5 minutes).

makes approximately 24 cupcakes

Friday, July 31, 2009

Gobs

I know, I know...I already published this recipe almost three years ago. I was just at my family reunion this past weekend, though, and I updated the recipe based on the awesome family recipe book that my cousin Candy put together for us. This recipe is listed as one of my cousin Laura Haberl's favorites (thanks for including it, Laura!). Since I didn't get to the gobs that one of my amazing relatives brought to the family reunion before my other hungry relatives did (collective sigh of pity for me..."awww"), I couldn't resist making them this week. So, that means I also have photos of the gobs now to show how they're supposed to look. Enjoy!

Gobs are a tradition in western Pennsylvania. My mom and I were recently discussing the cultural origins of the gob, and neither of us could think of the appropriate country from which these divine desserts come. This discussion lead me, of course, to my favorite place to search for answers...Google.

Apparently the closest "city" to my hometown, Johnstown, Pennsylvania, currently has its own website to attract tourists (who knew? If you're interested, check out http://www.visitjohnstownpa.com/). According to Susan Kalcik, a folklorist and archivist with the Southwestern Pennsylvania Heritage Preservation Commission (again, who knew?), the gob's origin can be traced to medieval Germany. Gobs were most likely brought to America by various German groups such as the Amish or the German Brethren. After arriving in the states, they probably became popular in western PA due to their ability to travel well in lunch bags into coal mines or steel mills. Ms. Kalcik believes that gobs received their name from the term coalminers used for lumps of coal refuse ("gob piles").

No matter what their origin, gobs are a special treat for those visiting areas of Pennsylvania heavily settled by early Germans. I've recently begun using dark cocoa in many of my recipes, and I enjoyed this recipe with half dark and half regular cocoa.


Chocolate Cake Ingredients/Directions:
2 c. sugar
1/2 c. shortening
2 eggs
4 c. flour
3/4 c. cocoa
1/2 t. baking powder
1 c. of boiling water
1 c. sour milk (1 Tbsp. lemon juice or vinegar to sour it)
3 t. baking soda
1 t. vanilla

Cream together the sugar, shortening, and eggs. Add the flour, baking powder, and cocoa to the creamed mixture and blend well, about 1 minute. Add the boiling water and the baking soda to the sour milk, and add to previous mixture while beating constantly until well mixed. Drop by tablespoon on ungreased cookie sheet, about 2 inches apart. Bake at 375 degrees for about 6 minutes. Cool before icing.

Gob Icing Ingredients/Directions:
8 1/2 T. flour
1 1/2 c. milk
1 c. margarine
3/4 c. shortening
1 t. vanilla
1/2 t. salt
2 cups powdered sugar

Cook flour and milk together over low heat. Stir continuously until thick like paste (should be the same consistency as toothpaste or mashed potatoes...thick!). Remove from heat and cool. Cream together the margarine, shortening, vanilla, and salt with flour mixture. Beat in the powdered sugar and continue beating until smooth and fluffy (about 3 to 4 minutes).

Put icing between gob cakes and wrap with waxed paper or plastic wrap (or both, if you run out of waxed paper like I did).

Thursday, June 04, 2009

Naan


This recipe for naan is not a traditional recipe, but it makes a pretty good version. I found another version that includes yogurt, which is more traditional for Indian naan. Since we didn't have any yogurt in the house (my dh loves the stuff, and gobbles it up practically as soon as we're back from the grocery store), I decided to try this one out. This bread goes well with soupy Indian dishes to sop up the mess.

By the way, this stuff freezes beautifully. I had way too much when I made it last week, so I popped it into a freezer bag. I pulled it out last night for dinner and heated it up in a frying pan (in the 90 degree Florida heat, there was no way I was turning on the oven!), and it worked great.

Ingredients
2 1/8 tsp. active dry yeast (one packet)
1 cup warm water (bathing temperature)
1/4 cup white sugar
3 tablespoons milk
1 egg, beaten
2 teaspoons salt
4 1/2 cups bread flour
1/4 cup ghee or butter, melted

Directions
1. Whisk the warm water with the yeast and sugar in your stand mixer until the yeast is dissolved. Cover and let stand in a warm place for 10 minutes.

2. Stir in the milk, egg, and salt. Begin adding enough flour to create a ball of dough (about 3 1/2 to 4 cups), and then switch out your beater attachment for the dough hook. Knead for 6 to 8 minutes, adding flour as necessary to create a smooth, elastic dough.

3. Remove the dough from the bowl, oil the bowl and the dough, and place the dough back into the bowl. Cover with plastic wrap and let stand in a warm place for 1 1/2 hours or until the dough is doubled in size.

4. Punch down the dough, and then knead again for 5 minutes. Divide dough into 6 pieces. Roll each piece out into 8 inch round naans.

5. Cover an oven tray with foil and grease the foil. Brush the naan with the melted ghee or butter. Cook naan under a very hot grill for about 2 minutes on each side or until puffed and just browned.

Tuesday, June 02, 2009

Mango Shrimp Ceviche


Not sure if I've mentioned this before, but I am a huge fan of Tex-Mex (well, really any recipe that includes cilantro!). I happened to have some green onions and some cilantro in my fridge that needed to be used up sometime in the very near future, and what better recipe to use them up in than a yummy shrimp ceviche. Although I've loved ceviche since my honeymoon five years ago in Mexico, I've never had the guts to try to make it. The whole thought of the shrimp actually cooking without ever being exposed to heat? I had my doubts, no matter what the others said. I thought I was bound to do something wrong and have a horrible case of food poisoning if I even attempted such a feat. Well, I sampled some of this yumminess for lunch today, and no issues yet!

Please note that, like many of my recipes, the quantities of the ingredients are adjustable depending on how much of each you have on hand.

Ingredients
1/3 pound uncooked shrimp, peeled, deveined, tails removed, and chopped into smallish pieces
4-5 Tbsp. lime juice
2-3 Tbsp. lemon juice
1/4 cup green onions, sliced
1/4 cup red onion, diced
3 Tbsp. fresh cilantro, minced
1/3 cup red pepper, diced
2/3 cup mango, chopped (I used frozen mango, and it worked great)
1 avocado, diced
kosher salt, to taste (1-2 tsp.)

Directions
Place the shrimp pieces in a bowl and cover with the lime and lemon juices (use more or less as necessary to ensure they are covered completely). Cover and refrigerate for 1 hour, or until completely opaque (mine only took 30 minutes, but it depends on the size of your pieces). Gently fold in remaining ingredients and stir to combine. Serve with tortilla chips, crackers, or toasted pita points.

Thursday, May 28, 2009

Tip of the Day - Croissant Sandwiches


This isn't so much of a recipe as it is random information that I find to be interesting. While I realize others may not find my interests even remotely stimulating, this is my blog and therefore you are stuck with my ramblings. Since, as I mentioned, this is not technically a recipe, I'm calling it a "tip of the day." And here it is...cheese, eggs, and bread freeze well.

I know, not mind-boggling information, but it can come in quite handy if, say, you really like to enjoy croissant breakfast sandwiches prior to your work day, you're too cheap to purchase them from a fast-food joint, and the only cooking tools at your disposal are a toaster oven and a microwave (ok, you caught me...I'm referring to my personal situation). Well, not to worry -- you can prepare numerous croissant breakfast sandwiches at one time, freeze them, and then reheat them in aforementioned cooking tools!

Here's the scoop. You can purchase eggs-in-the-carton, croissants, Morningstar Farms veggie sausage patties (have I mentioned that I'm a pescetarian?), and individually wrapped cheese slices from your bulk foods store (a/k/a Costco, but I'm not sure I'm supposed to say that here. Wait, I just did. Oops.). Fry up the eggs in sandwich-sized batches and set them aside on a plate to cool. When they are cool, place a sliced croissant, slice of cheese, sausage patty, and the egg into a sandwich bag (it helps for later separation if the egg is between the plastic baggie and the plastic wrapped sliced cheese). And into the freezer they go.

If you just use the cheapo sandwich bags (although stick with the zipped topped variety), it will usually take at least a month until they get freezer burned. If you splurge on the freezer variety, they'll stay a bit longer. When you're ready for your sandwich, pull all of the ingredients out of the bag and place the egg and the sausage patty onto a microwave-safe plate. Microwave them for one-minute, and then check to see if they're done. If not, microwave a bit longer until they're no longer frozen. Meanwhile, toast the croissant in the toaster oven. When the egg/sausage is warmed, you'll probably need to blot it a bit with a paper towel (I'm not sure where all the water comes from, but it definitely appears during the thawing process). Put the frozen slice of cheese on the egg and microwave for another 10 seconds.

After your croissant is toasted, layer all of the ingredients and voila! As good as any fast-food joint, and way cheaper.

Wednesday, May 13, 2009

Pizza Dough

This has got to be my very favorite pizza dough recipe. And trust me, I've tried quite a few. Figures that it came from my trusty Betty Crocker cookbook (the standard version -- not to be confused with the also-excellent Vegetarian version). It's truly better if you can wait a day to use the dough, but if you can't, give it the 30 minutes to rest a bit after all the abuse it will take from kneading and then use it on up in your favorite pizza recipe. This recipe doubles nicely to freeze half (yup, just plop it in a freezer bag and into the freezer...move it to the fridge on the morning of the night that you'd like to use it for it to defrost). If you have a stand mixer, use it. If not, you'll have to get a bit of a workout. Sorry.

I'm going to try this one a bit differently by listing the ingredients with the steps as I go. Just know beforehand that you'll need all-purpose flour, bread flour, yeast, sugar, salt, olive oil, and water. The bread flour might be a stretch for some...if you're not willing to take that trip to the store to get some, just use the all-purpose flour for all of it.

Directions
1. Put 1/2 cup of all-purpose flour, 1 1/2 tsp. sugar, 1/2 tsp. salt, and a heaping teaspoon of yeast (about half a packet, if you're using that kind) in the bowl of your stand mixer (or a medium bowl if you don't have a stand mixer). Stir to combine.

2. Add 1/2 cup of very warm water (the temperature you'd take a shower in on a really cold winter night) and 1 1/2 tsp. olive oil, and mix on medium speed (either in your stand mixer with the beater attachment, or with a hand mixer) for 3 minutes.

3. Begin adding enough bread flour to form a soft dough (probably about 1/2 to 3/4 cup). When it forms a ball, switch out the beater attachment for the dough hook. If you're using the workout method, dump the dough onto a clean surface covered with a bit of flour (this is what they call "bench flour," but it's just regular old flour that you use to keep the dough from sticking to the counter).

4. Knead the dough for 8 minutes, adding additional bread flour as necessary to keep the dough from pooling at the bottom of the bowl (or to keep it from sticking to your hands if you're hand kneading it). To knead the dough by hand, press the heels of your hands into the dough, pushing it away from you. Pull the edge of the dough furthest from you up and over the top of the dough towards you, and then turn the dough ball a quarter turn and do it all again. And again. For 8 minutes. It doesn't have to be precise; you just have to beat it up by stretching it for awhile.

5. After the 8 minutes are up (or your arms hurt, whichever happens first), spray some cooking spray to coat a bowl. Put the ball of dough in there, and spray it too. Cover it with plastic wrap and wait 30 minutes.

6. Your pizza dough is now ready to use, or to put in the fridge to use tomorrow, or to put in the freezer to use the next time you're feeling like a pizza and a beer.


Also featured on...Pizza Dough on Foodista (thanks for suggesting me, Alisa!).

Monday, May 11, 2009

Mint Chocolate Chip Pudding

I got a craving for something chocolatey today. Since my husband has insisted that we remove anything remotely fattening from our home (unfortunately, this included ice cream), we no longer had any pre-made chocolate goodies. Although I am typically annoyed that I have to suffer for his lack of willpower, I must say that it is better for my waistline if I only enjoy goodies when I want them badly enough to actually cook them myself.


So, in my effort to find some form of chocolatey goodness that I could make out of the current contents of my pantry, I pulled out my trusty Betty Crocker cookbook and turned to the chocolate pudding page. Turns out, I already have all of the ingredients to make chocolate pudding from scratch right in my own cupboard. Nothing too incredibly strange (and by "strange," I mean anything I wouldn't find in my not-so-culinary-inclined Mom's home), except possibly the cornstarch.


Now, Betty Crocker is one heck of a cook, don't get me wrong. But I couldn't exactly get overly enthusiastic about her plain old chocolate pudding recipe. I decided to mix it up a bit...and by that, I mean adding alcohol. Can't go wrong there.


I added Creme de Menthe liquer to my version, as well as some extra chocolate chips. It would probably be equally as delicious with Frangelico, Bailey's (their flavored mint chocolate or caramel versions would be excellent), Grand Marnier (which I love, primarily due to its name being so close to that of my lovely sis, Marnee), Godiva liqueur, or even 99 Bananas (although that may take an extreme banana lover). I'm beginning to sound a bit like a lush here, so I'll continue on to the recipe...


Ingredients
1/2 cup sugar
1/3 cup cocoa
2 Tbsp. cornstarch
1/8 tsp. salt
2 cups milk
2 large egg yolks, slightly beaten
2 tsp. of your favorite liqueur (or simply vanilla, if you're not feeling overly adventurous)
1/3 cup chocolate chips, chopped

Directions
1. Stir together the sugar, cocoa, cornstarch, and salt in a smallish to medium sized saucepan. Set the saucepan over medium heat, and stir in the milk.

2. Keep stirring, and stirring, and stirring (a whisk comes in handy here), until the mixture comes to a boil. It takes forever. Well, maybe more like 6 or 7 minutes, but it feels like forever with the steam coming off the mixture onto your hand. After it starts to boil, stir it for another minute.

3. Add at least half the mixture into the egg yolks. Be sure to add the milk mixture to the yolks, not the other way around. This is called "tempering," which allows the yolks to gradually heat up (be sure to stir the yolks quickly while adding the hot mixture). If you try to rush this step, you'll end up with scrambled eggs in your pudding. Tasty.

4. Add the tempered yolk mixture back to the rest of the milk mixture, and continue to stir for another minute.

5. Remove from heat and add the liqueur. Pour into a glass bowl, cover, and refrigerate until chilled. If you don't like the skin that forms over pudding (which I actually enjoy), you'll want to press some plastic wrap right onto the top of the pudding. Although it will take the top portion of the pudding with it when you remove it, there won't be any skin. :)

6. After the pudding is chilled, stir the chopped up chocolate chips into it. Serve it in pretty glasses, and garnish with whipped cream and mint (if you've got it...otherwise, add more whipped cream!).

Friday, May 08, 2009

Black Bean Salsa

This "salsa" is actually what I typically just call my black beans, since I prepare them this way every time I boil up a batch o' dried black beans. I've moved to the dried version in the past few months as a small way to save on my weekly grocery bill. Here's the conversions between canned and dry:

15-oz can beans = 1 1/2 cooked beans, drained
1 pound dry beans = 6 cups cooked beans, drained
1 pound dry beans = 2 cups dry beans
1 cup dry beans = 3 cups cooked beans, drained

I know this involves math, but I readily admit that my frugality wins out over my hatred of basic math. Therefore, let's analyze this a bit. One can of black beans will run you about $0.89 at the grocery store, while a pound of dried black beans goes for about $1.69. Since you get the equivalent of 4 cans of beans out of a one pound bag, that would make the dried beans the equivalent of $0.42 per can. Not much, but it adds up.

Since I personally had no idea what to do with dried black beans, and hence resorted to purchasing the canned version, here's the scoop. You'll need at least two hours; 12 hours is preferable. To make 3 cups of cooked black beans, take 1 cup of dried black beans and spread them out in a shallow dish (a 9x13 pan works well here, or even a pie dish). Sort through them and remove any beans that appear to be shriveled or not bean-like (odd shape, discolored, etc.). Put them in a saucepan big enough to accommodate them and some water should they triple in size (which they will). Add enough water to cover them by two inches. If you have 8-12 hours, let them soak in the saucepan (overnight is fine - this is the longer "soak" period). If you only have two hours, bring the beans to a boil, turn them off, cover them, and let them sit for an hour (the "soak" period). After the beans have either soaked 8-12 hours or boiled and soaked an hour, drain them and add new water to again cover them by two inches. Bring them up to a boil and then turn the heat down to low. Simmer the beans for about an hour, or until you try one and it smooshes against the top of your mouth. They are ready to use in a recipe, or you can refrigerate them for up to about a week, or freeze them for a couple of months.


This recipe is good as a dip for tortilla chips, or as a base for Black Bean Patties or Rice and Black Beans (recipes to come). The quantities mentioned are approximate; feel free to adjust as necessary to fit the amounts that suit your taste or that you have on hand.

Ingredients
3 cups cooked black beans, drained (or two cans of black beans...but why spend the money? Didn't you read my novel above about the cost effectiveness of dried beans?)
1 cup sweet onion, chopped
3 Tbsp fresh cilantro, chopped (or 1 Tbsp dried cilantro)
2 Tbsp lime juice
salt to taste (kosher salt if you've got it - about 1 tsp)

Directions
Stir ingredients together in a bowl and refrigerate.

Friday, April 17, 2009

Peanut Butter

I know, I know...peanut butter is an ingredient, not a recipe. Today, I reconsidered this opinion. I've been on a mission recently to use up the random items that have been in my pantry for longer than I care to admit. Way in the back, I happened upon a huge canister of dry roasted peanuts from one of those warehouse stores. I'm not sure what ever made me think I could possibly utilize that many peanuts in my lifetime, but so goes the story of those types of places. The vast majority of products that I purchase there inevitably lead me scouring the internet for recipes in which to use them up (except for cheese, of course, which is the product that sends me to said warehouse store every three weeks...I know, a shame). In any event, I had a craving for peanut butter cup bars, but aforementioned pantry was all out of peanut butter. So began my search of the internet for directions on how to make peanut butter out of peanuts (it had to be possible, right?). It turned out to be way simpler than I had anticipated. Before I get started though, I must mention that having a food processor or a pretty phenomenal blender is crucial here.

Here goes...place whatever quantity of peanuts you need to use up into your food processor. Turn food processor on and let it run until the peanuts begin to dissolve into peanut butter. Add about a teaspoon of vegetable oil per cup of peanuts to thin it out, if necessary. If you like your peanut butter Jif-style, you probably will want to add a few teaspoons of sugar per cup of peanuts to sweeten it up. Taste test after each addition to see how you like it.

Really. It's that simple. Peanuts in a food processor. Crazy.

Wednesday, April 15, 2009

Corn and Crab Chowder

My wonderful hubby recently planned a surprise birthday party for me at one of my favorite restaurants in Neptune Beach, Florida...Caribbee Key Tropical Bar and Grille. Truthfully, I'm a sucker for any restaurant with the word "Grille" or "Bistrol" in its name, and adding the "Tropical" to it just makes it all the better for me. Caribbee Key is truly awesome though, and they have the best conch fritters in Florida (my husband has done the honors of taste-testing conch fritters throughout Florida, including the Keys, and he says it's true, so I must believe him). I was so busy enjoying the company of all my wonderful friends that I barely had time to grab a bite to eat myself. The corn and crab chowder on the menu caught my eye, and I ordered a bowl and slurped it down within 2 minutes of its smell reaching my noodle. The recipe below is my attempt at recreating the soup, but with more reasonably-priced canned crabmeat instead of the lump crabmeat they served in the soup. Although it's not quite as good as Caribbee Key's soup, it still satisfied the craving for soup I had today to ease this spring head cold I've caught.


Ingredients
2 tbsp butter
1/3 cup chopped onion
3 scallions, finely diced
1/2 cup chopped celery
3 tbsp flour
4 bouillon cubes
3 cups water
15 oz. (1 can) corn, with water
1 tbsp Old Bay seasoning
1 tsp hot sauce
12 oz. (2 cans) crabmeat
1/3 cup half and half
2 tbsp cilantro

Directions
1. Add butter, onion, scallions, and celery to a medium-sized saucepan over medium heat and saute until tender, about 5 minutes.


2. Add flour and stir until the vegetables are coated. Cook approximately one minute, until it gets golden-colored. This creates a roux, a common way to thicken soups and stews. Cooking the flour with the butter supposedly (according to the able chefs on the Food Network) imparts a nutty-flavor to the soup and prevents the flour from making the soup tastes "dough-ey."


3. Add the water and the bouillon cubes and whisk until the flour and bouillon cubes are completely dissolved.

4. Add the corn, Old Bay, and hot sauce. Stirring occasionally, allow to come up to a simmer. The full thickening affect of the flour is created when the soup is brought up to a simmer...until then, it might not look very thick.

5. Remove from heat. Using a submersion blender, blend the soup until it's creamy. If you don't have a submersion blender, you can allow the soup to cool a bit and blend it in a regular blender. Immersion blenders are awesome for making soups, though...they prevent the mess that always comes with my trying to pour a liquid into my nearing-the-end-of-its-life blender.

6. Stir in the crabmeat, half and half, and cilantro. Garnish with sour cream and additional cilantro.

Makes approximately 5 servings.

Nutritional Analysis (from Calorie Count): Calories - 231; Total Fat - 8.1g; Saturated Fat - 4.5g; Cholesterol - 32mg; Sodium - 1193mg; Total Carbohydrates - 33.1g; Dietary Fiber - 3.3g; Sugars - 8.3g; Protein - 9.7g; Vitamin A - 11% RDV; Vitamin C - 16% RDV; Calcium - 5% RDV;
Iron - 6% RDV.

Friday, April 10, 2009

Peanut Butter Cup Bars

I had the worst craving for Reese's peanut butter cups a few days ago. Since I do not allow myself to even gaze at the candy bars so temptingly placed near the check-outs in grocery stores, I did not have any of said yummy candy bars in my home. After waiting for the better portion of an afternoon for the craving to go away, I gave up and decided to make my own. Yum. I have now found my new go-to recipe for when I need to bring a sweet something to a [fill in the blank].


4 graham crackers
4 Tbsp. butter or margarine, melted
2/3 cup peanut butter
3/4 cup confectioners sugar
1 cup chocolate chips
4 Tbsp. butter or margarine


1. Put graham crackers in food process and process until completely crumbled. Add the 4 tbsp. melted butter, peanut butter, and confectioners sugar and process until combined. Press into bottom of a 9x9 pan.

2. Melt the additional 4 tbsp. butter in a saucepan over medium heat. Add the chocolate chips and stir until melted and completely smooth. Spread over peanut butter mixture and refrigerate until set.

Monday, March 23, 2009

Halushki

Halushki is a Gallaher family tradition. At our family reunion every year in July, one of my lovely aunts is bound to whip up a crock-pot full of this yummy wonder, and it's always a big hit. Even people who typically scowl at cabbage generally like halushki - must be something about the large quantity of butter that's involved. It's regularly served at the folk festivals that are so prevalent in Western PA during the summertime, and I love wandering around the festivals with my mom and sister, munching on halushki and funnel cakes. Yum.

I wish that I had a "grand finale" photograph of this dish, but alas, I forgot to snap one. Maybe next time.


Ingredients
1 head of cabbage
1 large sweet onion
2 pkgs. of home-style dumplings (you could substitute egg noodles if you can't find dumplings in your local grocer's freezer section)
1 c. butter or margarine
1 t. salt (kosher salt, if you have it)
1/2 t. pepper (or to taste)


Directions
1. Bring a large pot of water to boil on the stove. Dice the onion into small pieces, and chop the cabbage into strips about 1x2 inches (it doesn't have to be exact by any means).

2. Melt the butter in a frying pan, and saute the diced onion on medium-low. Meanwhile, drop the cabbage into the boiling water and cover, cooking until it's just tender (about 5 minutes). As the cabbage begins to soften, remove it in batches from the boiling water with a slotted spoon and transfer it to a crock pot.

3. After the cabbage is all cooked, allow the water to come back up to a boil and add the dumplings. Cook them for a few minutes until they're barely done (we're basically just looking to thaw them here...they'll cook more in the crock-pot. If you don't have a few hours to let everything meld together in the crock-pot, give them an extra few minutes in the boiling water). Drain the dumplings and add them to the crock-pot.

4. The onions should be golden and smell awesome at this point. Throw them into the crock-pot as well, and stir everything together. Add salt and pepper to taste, and allow to cook for a few hours (or however long you have) in the crock-pot on low. Be sure to stir every 20 minutes or so, because the sides will cook faster and burned cabbage doesn't smell good.

Harry's Fresh Produce

I've lamented recently on my inability to get to the farmer's market, since they are typically only open on the weekends (or they're further from my home than I'm willing to travel for a tomato). So imagine my delight when I realized that an apparent farmer's market vendor opened up a small store in a new strip mall virtually across the street from the aforementioned flea market selling cheap, fresh, and sometimes unusual produce. Harry's Fresh Produce is located on the south side of Beach Boulevard, just west of Peach Drive, and a little less than a mile east of Southside Boulevard (in the T-Rex strip mall with that horrible dinosaur with the scary eyes). The prices are reminiscent of the farmer's market (think $0.79/lb. for all varieties of tomatoes, $3.00 for 30 eggs, $1.00 for a block of tofu, and $0.99/lb. for those really cute miniature "apple bananas"), I'm guessing I could probably find those obscure ingredients for the Asian recipes I've been dying to try, and the sales clerks (whom I'm guessing may double as the owners) were very helpful in identifying the produce varieties with which I was currently unfamiliar. I'm always one to support small, local businesses, especially when they can offer me fresher products at a lower price! In any case, give them a try if you're looking for produce in the Southside area. You'll be glad that you did.

Snickerdoodle Chip Cookies


This is a traditional snickerdoodle recipe modified from Betty Crocker to include some yummy cinnamon chips (snickerdoodle chip cookies are on the left - I've gotten great mileage from this one photo! It also features brownies and oatmeal chocolate chip cookies). I think the chips definitely add something to the cookie. Although the recipe originally said to bake at 400 degrees, I baked them at 375 degrees and they turned out perfectly.

Ingredients
1 1/2 c. sugar
1/2 c. butter or margarine, at room temperature
1/2 c. shortening
2 large eggs
2 3/4 c. flour
2 t. cream of tartar
1 t. baking soda
1/4 t. salt
1/2 c. cinnamon chips
Topping
1/4 c. sugar
2 t. ground cinnamon

1. Preheat oven to 375 degrees. Beat together the sugar, butter and shortening until blended, about 30 seconds. Add the eggs and blend until combined. Stir in the flour, cream of tartar, baking soda, salt, and cinnamon chips.

2. Stir the topping ingredients together in a shallow bowl. Taking a teaspoon of dough at a time, roll the dough into a ball between your hands. Roll the dough balls in the topping and place on an ungreased cookie sheet.

3. Bake 8 minutes or until slightly brown around the edges. Immediately remove the cookies from the cookie sheet to cool.

Thursday, March 19, 2009

Brownies

Brownies are one of my all-time favorite desserts. In fact, I like them so much that occasionally I don't have a box of brownie mix in my pantry because I use it up too fast. That lead me to thinking that the mix cannot be all that difficult to replicate with ingredients that I already have in my pantry. If I can recreate things with pantry staples, I'd much rather do that than to have one extra box in my pantry (which anyone who's been to my house can attest is rather full already!). The recipe below uses cocoa, which is a cheaper alternative to baking chocolate. I always add extra chocolate chips to my brownies, because I don't think you can go wrong with extra chocolate. If you feel like this might be going overboard, by all means, leave them out.

This recipe is a great "base" recipe that you could easily doctor up to your own preferences. Most of the ingredient amounts below are doubled from typical brownie recipes, because I found that I kept doubling the recipes to fit my 9x13 pan. If you're making brownies in an 8x8 pan or a 9x9 pan, you could halve the recipe. The amounts listed below will make a super-thick, fudgy brownie that will probably take another 5-10 minutes to cook if you use the smaller pan. If you want to get creative, top the brownies with mint frosting and a chocolate coating, as in my sister's famous (or shall we say, infamous) Creme de Menthe Brownies. Or you could sustitute the chocolate chips for peanut butter chips and top the brownies with peanut butter frosting.

Ingredients

1 cup all-purpose flour
2/3 cup unsweetened cocoa powder (regular cocoa, or mix half regular with half dark chocolate)
1/2 teaspoon baking powder
1/2 teaspoon salt
1/2 cup chocolate chips (use more or less, depending upon your preference)
2 cups white sugar
3/4 cup vegetable oil
4 eggs (or 1 c. egg substitute)
2 teaspoons vanilla extract

Directions

1. Preheat oven to 325 degrees. Grease an 9x13-inch baking pan with butter, or spray it with cooking spray.
2. In a medium bowl, mix together all of the dry ingredients. Stir in the oil, vanilla, and eggs, stirring just until the dry ingredients are incorporated. Do not overmix the batter! Mixing it too much will make for a cakier brownie, while undermixing will keep your brownies fudgy and dense. Pour the batter into the prepped pan.
3. Bake for 20 to 25 minutes. One trick for determining their "done-ness" is to pick up the pan and tilt it. If the center starts oozing one way or the other, they're not quite done. If it doesn't ooze, pull them out! (You could always use the toothpick method, too...a toothpick inserted into the center should come out with little crumbs on it, but no gooey batter. Although, I never have toothpicks around to utilize this method; hence, the tilt and ooze method evolved.) Let the brownies cool before cutting them into squares (Brownies in the center, below. The other cookies are oatmeal chocolate chip on the right and snickerdoodle chip on the left.).

Wednesday, February 25, 2009

Croissants

What with all the time I'm spending at home now doing schoolwork, I've taken to experimenting with baking. I've discovered rather quickly that the process of baking bread from scratch has been given a bad rap. Yes, yes, it does require that you check on it occasionally over the course of the day, which is a bit difficult for those ensconced in 9 to 5 employment (or 8 to 5, as the case may be). But if you have the freedom to be near your home (or in your home) at 1 to 3 hour intervals, you can make some awesome baked goods with relatively little hands-on time. I've experimented a bit with your typical bread options (french bread, dinner rolls...recipes to come), but I decided yesterday to attempt to tackle the mother of all "bad rap" baked goods...croissants. And I'm happy to say, I'm glad that I did.

In an effort to make creating these beauties a bit easier to fit into your day, I've listed each task in the "Directions" as a time instead of numbering them (examples, of course...please don't leave comments asking why you need to start the recipe at precisely 8:00 a.m.). My next attempt will be to try making the dough through forming of the croissants stage, and then putting them in the refridgerator to rise overnight so that I can bake them in the morning. I'll keep you updated on the results of that endeavor...

(Modified from this recipe found on the All Recipes website)

Ingredients
1 ¼ teaspoons active dry yeast3 tablespoons warm water (about the temperature of your bath water)
3 teaspoons sugar
1 ½ teaspoons salt
2/3 cup milk
2 tablespoons vegetable oil
2 ¼ cups all-purpose flour (plus more for the table to roll out the dough)
2/3 cup unsalted butter, chilled
1 egg
1 tablespoon water

Directions (with time examples)
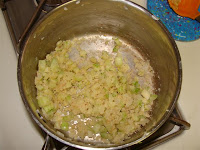
8:00 a.m. - In the mixing bowl of your stand mixer, add the yeast, warm water, and 1 teaspoon of the sugar. Let the mixture stand until it becomes creamy and frothy (about 5 minutes - see the first photo below). Meanwhile, heat the milk in the microwave until it is very warm, and dissolve the additional 2 teaspoons of sugar and the salt into the warmed milk.


8:05 a.m. - Add the milk mixture and the vegetable oil to the yeast mixture, and blend in the flour using the paddle attachment until it is well mixed (a minute or two - the second photo above).

8:07 a.m. - Change the attachment to the dough hook and knead the mixture until it is smooth (about 5-7 minutes). If the dough is pooling at the bottom of the bowl (like in the first photo below), add more flour and allow it to incorporate into the dough ball. Add only enough flour to just form the dough ball without any remaining dough pooling at the bottom; if flour remains in the bottom or on the sides of the bowl, you’ve added too much flour. Add some additional water to compensate for your over-exuberance with the flour.


8:15 a.m. - When the dough is smooth, remove it from the bowl and oil the bowl with vegetable oil. Put the dough back in the bowl and turn it to coat it in the oil. Cover with plastic wrap, and let is rise in a warm place until it’s about triple its size (could take as little as 1 hour, but may take up to 3 hours).

11:00 a.m. - Deflate the dough ball gently, and allow it to rise again (still covered with the plastic wrap) until it’s about double in size (probably at least another hour).

12:30 p.m. - Deflate the dough, cover it with the plastic wrap again, and put it in the fridge. Get out the butter, a rolling pin, and some more plastic wrap. Wrap the butter loosely in a big piece of plastic wrap and then hit it and roll it with the rolling pin into a thin, rectangular shape (about 6x10 inches). Make sure the butter is still completely covered with the plastic wrap, and place it in the freezer. Even if it’s too cold when you pull it out of the freezer, it will warm up very quickly when it’s this thin.

Butter prior to beating it up and following its beating with the rolling pin:


1:00 p.m. - Roll out the dough into a rectangle (about 8 x 15 inch). Take the butter out of the fridge, and unwrap it from the plastic wrap onto the top 2/3 of the dough (you should leave about a ½ inch margin the whole way around the butter…push it into the center if it sticks into your ½ inch margin). If it’s not coming off of the plastic wrap, just use a knife to get it out and spread it around a bit.

Fold the unbuttered bottom third up over the middle third, and then fold the buttered top third down over the middle.

Turn the whole thing 90 degrees, so that the folds are on the left and the right.
Using the rolling pin, roll it out again (stretch it) to another 8 x 15 inch rectangle.
Do the same folding technique again, but without the butter – bottom third up, top third over that fold.

Sprinkle lightly with flour, and wrap the dough back up in the plastic wrap. Put it back in the refrigerator until it is nice and cold (about 30 minutes).

2:00 p.m. - Unwrap the dough, sprinkle it with a little bit of flour, roll it back out to a 15 x 8 inch rectangle, and fold it again just like above (into thirds, turn, then into thirds again – just no butter this time). Wrap and chill another 30-60 minutes. At this point yesterday, I put the dough (wrapped up) back in the refrigerator overnight and it worked just fine.

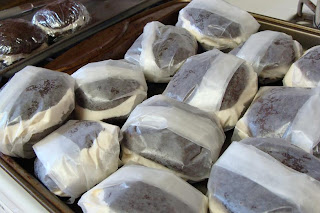
3:00 p.m. – (or the next morning, in my case) Drag the dough back out of the refrigerator and roll it out again into another rectangle. Cut it into triangles (not right triangles…cut it into triangles with three acute angles…how’s that for a flashback to Plane Geometry class?). I’ve read in several places that it should be rolled to a 1/4-inch thickness, but after the second time of making this recipe, I think I would prefer the croissants if the dough were rolled a bit thinner (say, 1/8 inch) and triangles were a bit larger than shown in the photos below. The croissants turned out pretty small this time (that's them in the photo up top).

Be sure to keep it chilled while you’re working with it, or the butter will melt out of the dough. If it’s starting to feel melt-y, cut it in half and put one half in the refrigerator while you work with the other half. Roll each of the triangles from the odd-sized edge to the smallest angled-point (they’ll be pretty small croissants, but they’ll rise to at least double, if not triple, their size…cut your triangles appropriately). Curve them around (this would have been easier for me if the dough had been rolled thinner and the triangles were larger) and place them on a cookie sheet covered with parchment paper. Cover them with the plastic wrap and let them rise until they’re really big (probably 2 to 4 hours…I left them for 3 hours this morning while I ran errands and came back home to bake them).

6:00 p.m. - Whisk the egg with the water and brush over the tops of the risen croissants. Bake them at 425 degrees for 10 minutes, and then decrease the temperature to 375 and bake for another 10-15 minutes or until golden brown. FYI – I believe the purpose of the higher temperature is to get the butter in between the layers of dough hot enough to form steam, which will cause the croissants to puff up. However, if you leave the croissants in the oven at that hot of a temperature for the entire time, they may brown more than you would like. With that info, play with the temperatures/times as you will to get your favored result. I left them in the oven on 425 for the whole time this morning, and they were almost as good as turning down the heat for the second half. This morning’s batch was just a bit browner on the outside and not quite as brown and puffed in the center.

6:30 p.m. - Eat your friggin’ yummy croissants!